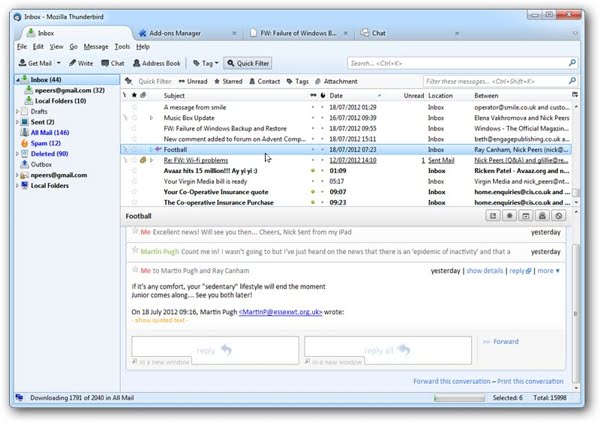
Mozilla Thunderbird email software

Thunderbird devotees will not hear a word against it, and certainly the reviews are pretty complimentary. Almost all email packages need to be compared against the industry standard which is Outlook (see elsewhere) and Thunderbird is no exception. It does everything that Outlook does except integrate with Microsoft Exchange. It also hasn’t got its own diary/calendar, but there are calendars available as add-ons to the basic program.
There are two features in particular which are not available in Outlook. One is the ability to group email under individual tabs. The other is that there are is a wide variety of ‘Add-Ons’ available. Add-Ons let you to customise the software as you see fit.
To see a full review of various email software, click here.
To go to the Thunderbird website, click here.

- Easy setup – Thunderbird has an online database. This helps when you set up a new email account. All you need to do is to key in your name, your email address and your password and the software does the rest.
- One-click Address Book – Next to each email sender’s name is a little golden star. To add them to your address book, all you need to do is to click on the star.
- Attachment Reminder – How many times have you pressed ‘Send’ but forgotten to attach an attachment? Thunderbird scans the outgoing email to see if there’s anything in it to suggest that you might mean to send an attachment and reminds you just in case!
- Internet search – the software is set up so that you can do a search without having to go to a browser.
- Find an email – all your email is indexed so that searching through it is quicker.
- Automated updates – the software automatically checks to see if there have been any updates released since it last ran. If there is a new release, then a prompt appears which you can accept, postpone or reject.
These are just some of Thunderbird‘s features. Please see the website for the latest and most comprehensive list.
How to Configure Thunderbird Settings for Net2Air
To configure Thunderbird to work with an email address on the Net2Air mail server, the following configuration must be used. To get to it, go to ‘Tools – Account Settings’ from the top menu bar, then go to:
- Server Settings
- The Server Name is ‘mail.net2air.co’
- The Username – The username is user.domain.tld (so for example for the email address ma**@********rg.uk, the username is mark.secret.org.uk). Just to be completely clear, the username is identical to the email address except that the ‘@’ is replaced with a full-stop ‘.’;
- The ‘Port’ should be set to ‘143’
- Security Settings
- The Connection Security setting should be ‘STARTTLS’.
- Password – choose ‘Normal password’. Passwords are set up individually and can be changed on request.
- You can then safely ignore the remaining options on the ‘Server Settings’ tab, but don’t click on ‘OK’ yet!.
- Next, about three-quarters of the way down the list on the left of the dialogue box, you will see a heading ‘Local Folders’, and at the bottom of that section a sub-heading of ‘Outgoing Server’. Click on ‘Outgoing Server’.
- You should see a list of email addresses in a smallish dialogue box (but there may, of course, be only one). Click on the one that you want to edit and then click on the ‘Edit’ button on the right hand of the dialogue box.
- A further small dialogue box will appear with the title ‘SMTP Server’. This is your outgoing server You can type whatever you like in the ‘Description’ box – we suggest ‘Net2Air Outgoing’.
- In the ‘Server Name’ box you need to type ‘mail.net2air.co’.
- Next is the ‘Port’ box. In there, type ‘587’.
- The next section is the ‘Security and Authorisation’ section
- Under ‘Connection Security’ there is a dropdown. Select ‘STARTTLS’.
- The box below is labelled ‘Authentication Method’. For that, please select ‘Normal password’.
- Finally, the bottom box asks you for your username. As before, the username is user.domain.tld (so for example for the email address ma**@********rg.uk, the username is mark.secret.org.uk). Just to be completely clear, the username is identical to the email address except that the ‘@’ is replaced with a full-stop ‘.’
- That should be it! Click on ‘OK’ for the ‘SMTP Server’ box and then ‘OK’ for the ‘Account Settings’ box and all should be well. Send yourself a test email, or get a friend to send you one and make sure that all is well!
